Effective risk management for events means identifying, assessing, and controlling threats to people, operations, data, and brand reputation before they become incidents. If you’re standing up an activation, conference, or product launch, start here:
- Create a one-page risk register listing every identified hazard with a likelihood and impact score.
- Assign a named owner to each high-priority risk item — not a department, a person.
- Confirm all permits are applied for and approved at least 30 days before load-in.
- Verify Certificates of Insurance (COIs) from every vendor, contractor, and venue.
- Establish an incident command structure with a named Incident Commander and clear escalation thresholds.
- Test your communications plan — radios, backup channels, and pre-approved stakeholder message templates — before the event day.
These six steps are not bureaucratic formalities. They are the difference between a recoverable situation and a brand-damaging crisis. Sponsors, venues, and municipal authorities increasingly require documented safety plans as a condition of approval, and your legal exposure depends on having them in writing.
Key Takeaways
A documented, owner-assigned risk register completed before venue confirmation is the single most effective action an event planner can take to reduce incident likelihood and protect brand reputation.
| Point | Details |
|---|---|
| Start with the risk register | Build a shared register with likelihood × impact scores and named owners before any other planning task. |
| Use the 90/60/30/7/1 timeline | Front-load permits and COI collection; run your tabletop exercise at the 30-day mark. |
| Map ICS roles to real people | Assign a named Incident Commander, Safety Officer, and PIO before the event, not during an incident. |
| Hold a 5–15% contingency reserve | Set aside 5–15% of total production budget for weather, vendor failure, and last-minute scope changes. |
| King Sixteen as production partner | King Sixteen manages COIs, vendor vetting, AV redundancy, and on-site logistics as standard scope. |
Table of Contents
- How to build your event risk management plan step by step
- What are the most common risks at brand events?
- How should you structure on-site incident command?
- What permits and insurance do U.S. events require?
- Which exercises actually validate your event safety plan?
- When should you complete each risk task, and what should you budget?
- How do you close the loop after an incident?
- What templates and tools should you use for event risk tracking?
- What experienced planners actually prioritize when time is short
- King Sixteen reduces your risk exposure from day one
- Authoritative resources for deeper reading
- Sources
How to build your event risk management plan step by step
A solid event risk management plan follows a repeatable workflow. Run through it for every event, regardless of size, and you’ll produce a living document that your whole team can act on.
Step 1: Scope the event
Define the event’s physical footprint, expected attendance, duration, and stakeholder list. Note any factors that raise the baseline risk profile: alcohol service, pyrotechnics, temporary structures, outdoor exposure, or a high-profile guest list.
Step 2: Identify hazards
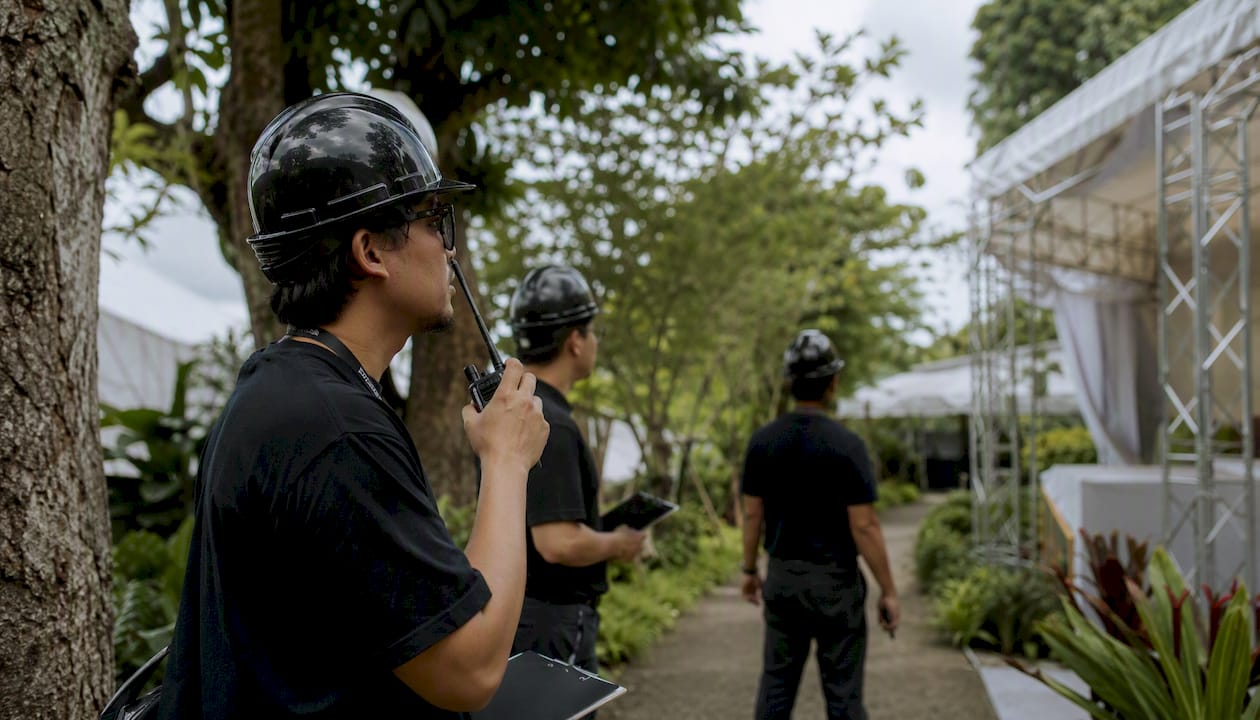
Gather your production team, venue contact, and key vendors for a structured hazard identification session. Walk the site, review the run-of-show, and list every plausible failure mode. The WHO’s All-Hazards Risk Assessment Tool provides a systematic, evidence-based framework for this step, covering host-capacity gaps and precautionary measures that are easy to miss in a fast-moving production environment.
Step 3: Score each hazard (likelihood × impact)
Rate likelihood and impact on a 1–5 scale. Multiply them to get a risk score. Anything scoring 12 or above demands a mitigation plan and a named owner.
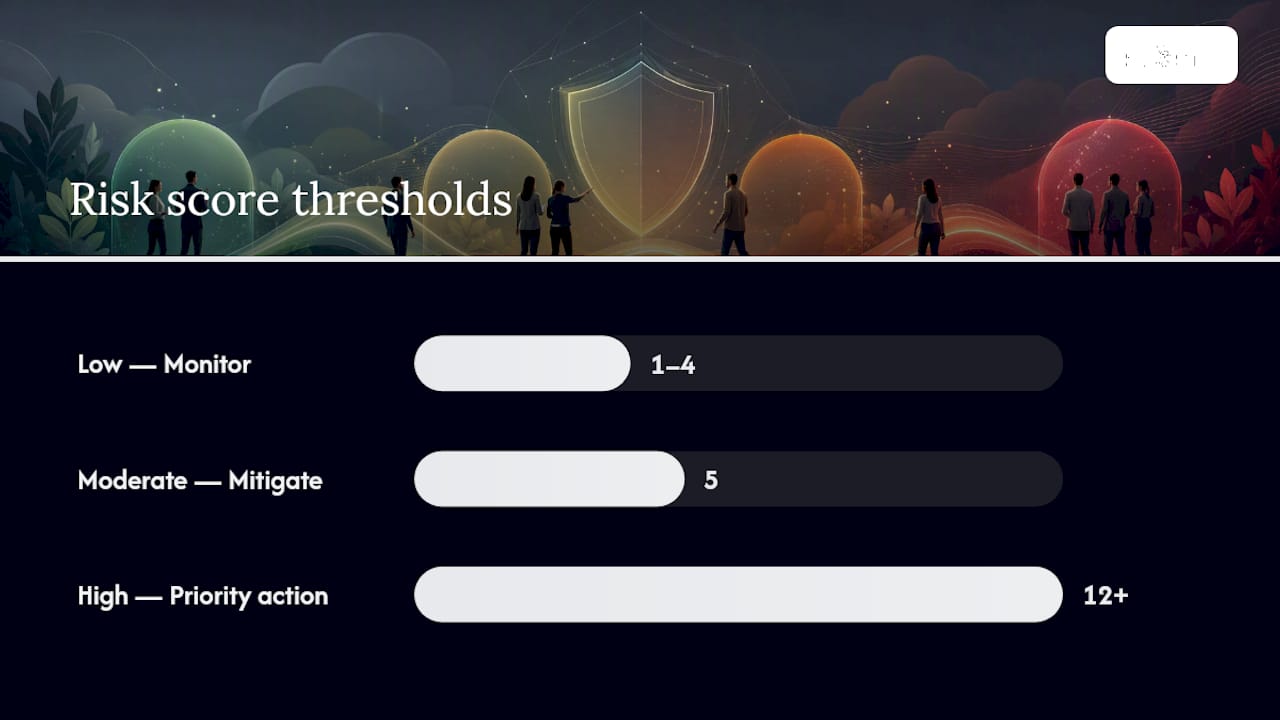
| Score | Likelihood (1–5) | Impact (1–5) | Risk Level |
|---|---|---|---|
| 1–4 | Low | Low | Monitor |
| 5 | Moderate | Moderate | Mitigate |
| 12 | High | High | Priority action required |
Step 4: Populate the risk register
Your register is the operational backbone of your event safety plan. At minimum, capture these columns for each hazard:
- Hazard — what could go wrong
- Likelihood score — 1 (rare) to 5 (almost certain)
- Impact score — 1 (negligible) to 5 (catastrophic)
- Risk score — likelihood × impact
- Mitigation — specific control measure(s)
- Owner — named individual responsible
- Trigger — the condition that activates the response
- Status — open, in progress, closed
Step 5: Prioritize, mitigate, transfer, or accept
Not every risk gets the same treatment. High-scoring hazards get active mitigation or transfer (insurance, vendor contracts). Mid-range risks get monitoring protocols. Low-scoring risks are accepted and logged. The Events Industry Council Risk Management Guidebook is the standard industry reference for accepted mitigation frameworks and template language you can adapt directly.
Step 6: Monitor and review
The plan is not finished when you print it. Assign a regular review cadence during the planning phase, and update the register with any vendor changes, permit updates, or run-of-show evolutions.
Pro Tip: Store your risk register in a shared cloud document — Google Sheets or Notion work well — so every department head sees the current version in real time. A PDF emailed once is a snapshot; a shared live doc is a system.
What are the most common risks at brand events?
Every event carries a unique risk profile, but certain categories appear consistently across experiential campaigns, product launches, and large-scale conferences. Here’s how to approach each one.
Crowd management
Crowd density, flow bottlenecks, and queue behavior are the most frequent sources of on-site incidents at brand activations. Seattle’s Public Safety and Event Management Plan provides explicit crowd manager ratio guidance and fire risk assessment items that translate directly to large-scale events. Good site design — clear sightlines, marked egress, and logical traffic flow — is your first mitigation. For guidance on how layout decisions affect crowd behavior, the principles behind designing branded environments apply directly to safety planning.
Early-warning indicators: unexpected queue stacking, crowd noise spikes, staff radio silence, or attendees bypassing designated entry points.
Weather
Outdoor and semi-outdoor events need a weather decision matrix built into the run-of-show. Define the wind speed, lightning proximity, or temperature threshold that triggers a hold, a shelter-in-place, or a full evacuation. Assign someone to monitor the National Weather Service forecast from 72 hours out.
Production and AV equipment
Generator failures, rigging load miscalculations, and power distribution faults are among the most operationally disruptive production risks. Require load calculations and rigging certifications from your AV and staging vendors. Build generator redundancy into the production budget, not as an afterthought.
Medical emergencies
Every event needs a designated medical response plan: the location of the nearest AED, the name of the on-site medical contact, and the protocol for calling 911 and meeting first responders at the venue entrance. For events with 500 or more attendees, a contracted EMS provider on site is worth the cost.
Fire
Fire risk at events typically centers on temporary structures, cooking equipment, pyrotechnics, and electrical load. Require a fire risk assessment from your venue and confirm fire marshal approval for any open flame, fog machine, or high-heat production element. Fire extinguisher placement and egress clearance are standard items in any municipal safety plan submission.
Security
Security planning covers access control, credentialing, bag checks, and suspicious-activity protocols. CISA’s guidance on suspicious activity and items gives your security staff a practical framework for identifying and reporting threats without creating unnecessary alarm. Brief your team on the difference between a suspicious item and an unattended one — the response protocols differ.
Transportation and logistics
Vendor load-in conflicts, traffic control failures, and parking overflows create cascading delays that affect every other department. Coordinate with local traffic authorities early, and build a load-in schedule with buffer windows between vendors.
Food and vendor failure
A vendor no-show or a food safety incident can derail an event faster than almost any other single failure. Require food handlers to carry current health department certifications, and confirm backup vendor options for any single-source catering arrangement. CDC guidance for event attendees outlines public-health mitigations that apply to food service, handwashing stations, and high-touch surface management at gatherings.
Cyber and data risk
Brand activations increasingly collect attendee data through registration platforms, lead-capture apps, and geoframe advertising integrations. Confirm that your technology vendors are CCPA/state privacy law compliant, use encrypted data transfer, and have a breach notification protocol in writing.
Statistic callout: Seattle’s municipal event safety template requires crowd manager ratios and a completed fire risk assessment for large-scale events — a useful benchmark for any large-scale brand activation regardless of city.
How should you structure on-site incident command?
The clearest operational model for managing incidents at events is the Incident Command System (ICS), the structure that FEMA’s NIMS framework formalizes for coordinating response across agencies and teams. Mapping ICS roles to named people in your plan before the event is the fastest way to reduce confusion when something actually goes wrong.
Core ICS roles for events
- Incident Commander (IC): The single decision-making authority during an incident. All other roles report to the IC.
- Operations Lead: Manages field teams and executes the IC’s directives on the ground.
- Logistics: Controls resources — equipment, supplies, transportation, and vendor coordination.
- Safety Officer: Monitors conditions and has authority to halt unsafe activities.
- Public Information Officer (PIO): Manages all external communications, including media and stakeholder notifications.
- Liaison Officer: The point of contact for municipal first responders, venue management, and sponsor representatives.
Communications structure
Your comms plan needs three layers: primary (radio channels by department), backup (cell phone tree with named contacts), and a single source of truth for incident status updates. Pre-write stakeholder message templates before the event — one for a hold, one for an evacuation, one for a medical response. When an incident is unfolding, no one has time to draft copy from scratch.
For event staffing at large activations, brief every staff member on which radio channel to monitor and what language to use when reporting an incident. “Possible medical, northwest corner, Gate 3” is more useful than “someone fell near the bar.”
Evacuation and handover
Prepare a site map with marked evacuation routes, assembly points, and accessible egress paths. Share it with venue management, your security contractor, and local fire and police liaisons before the event. When you hand off to first responders, lead with: current incident status, number of people affected, location, and any hazards they need to know about entering the site.
Pro Tip: Give first responders a laminated one-page site map with your ICP location, utility shutoffs, and the IC’s direct cell number. It takes 20 minutes to prepare and saves critical minutes during an actual response.
What permits and insurance do U.S. events require?
Permit and insurance requirements vary by city, county, and venue type, but the categories below apply to the vast majority of U.S. brand events and activations.
Common permit types
- Special event permit — issued by the city or county, required for most public or semi-public gatherings above a minimum attendance threshold.
- Fire marshal approval — required for any temporary structure, open flame, pyrotechnics, or occupancy above the venue’s standard load.
- ABC license — required for alcohol service; timeline varies by state, but many jurisdictions require 30–60 days’ lead time.
- Public works / street closure permit — required for any activation that affects traffic, sidewalks, or public right-of-way.
- Health department permit — required for food service, especially temporary food booths or catering from unlicensed kitchens.
- Noise permit — required in many municipalities for amplified sound above a decibel threshold or after certain hours.
Insurance checklist
Confirm the following coverage types before the event:
- General liability — your policy and your venue’s policy; confirm limits and additional insured status.
- Vendor COIs — every contractor, caterer, AV company, and staffing agency must provide a current Certificate of Insurance naming your organization as an additional insured.
- Event cancellation / non-appearance insurance — covers financial loss from weather, venue failure, or key-person cancellation.
- Workers’ compensation — required for any paid staff or contracted labor on site.
- Liquor liability — required if your organization is the alcohol licensee.
Pro Tip: Request COIs from all vendors at least 30 days before the event and verify that the policy expiration date covers the full event period including load-in and load-out. A COI that expires the day before your event is not coverage.
When permitting questions exceed your team’s expertise, escalate to your venue’s event coordinator or your municipality’s special events office. Most major U.S. cities have a dedicated special events liaison who can clarify inter-agency requirements and flag missing documents before they become day-of problems.
Which exercises actually validate your event safety plan?
A plan that has never been tested is a document, not a system. Three exercise types give you progressively deeper validation.
Exercise types and when to use them
Tabletop exercise: Gather your command team around a table and walk through two or three high-impact scenarios — a medical emergency, a weather evacuation, a vendor no-show. No physical movement required. The goal is to surface decision gaps and confirm that roles are clear. Run this 30 days before the event.
Walk-through: Walk the actual site with department leads and trace the physical path of each scenario. Confirm that egress routes are clear, radio dead zones are identified, and the ICP location works operationally. Run this during the venue site visit, ideally 7–14 days out.
Live drill: A full-scale rehearsal involving staff, security, and sometimes first responders. Reserve this for large-scale events (500+ attendees) or events with elevated risk profiles. Coordinate with your venue and local authorities before scheduling one.
Pre-event briefing checklist
Cover these items with every staff member, volunteer, and vendor representative before doors open:
- Their specific role and reporting chain
- Radio channel assignment and call sign
- Location of the ICP and first aid station
- Evacuation routes and assembly points
- The trigger phrase or signal for a hold vs. a full evacuation
- Who to call and what to say when reporting an incident
For guidance on structuring event staffing briefings for high-impact activations, the same principles that drive brand performance on the floor apply to safety readiness.
Recording and evaluating exercises
| Exercise Type | Record | Evaluate | Output |
|---|---|---|---|
| Tabletop | Written scenario log | Decision gaps, role confusion | One-line corrective actions per gap |
| Walk-through | Photo/video of site | Flow bottlenecks, dead zones | Updated site map and comms plan |
| Live drill | Video + incident log | Response times, coordination | Updated playbook and training notes |
Pro Tip: Record walk-throughs and live drills on video. A two-minute clip of a bottleneck at Gate 2 is more persuasive in a debrief than any written description, and it becomes a training asset for the next event.
When should you complete each risk task, and what should you budget?
Risk planning has a natural timeline that mirrors your production schedule. Front-load the documentation work and you’ll avoid the permit scrambles and insurance gaps that derail events in the final two weeks.
90/60/30/7/1 day milestone table
| Milestone | Key Risk Tasks |
|---|---|
| 90 days out | Scope event, begin hazard identification, initiate permit applications, identify insurance requirements |
| 60 days out | Complete risk register draft, confirm vendor COI requirements, submit special event permit applications |
| 30 days out | Verify all COIs received, confirm permits approved, run tabletop exercise, finalize comms templates |
| 7 days out | Conduct site walk-through, confirm ICP location, brief department leads, test all radio channels |
| 1 day out | Final staff briefing, confirm first aid and security posts, distribute laminated site maps, test backup comms |
Budget guidance
Allocate contingency funds as a discretionary reserve within your total event budget, adjusting based on event complexity and risk level. Specific budget buckets to plan for:
- Security staffing — proportional to attendance and risk profile
- Medical response — on-site EMS or first aid, AED rental if not venue-provided
- Insurance premiums — event liability, cancellation, and liquor liability where applicable
- Permit fees — vary widely by municipality; confirm early
- Contingency reserve — 5–15% of total production budget
Pro Tip: Build change windows into every vendor contract — a clause that allows scope adjustments up to 14 days before the event without penalty. Pair this with your contingency reserve, and you have real flexibility when the run-of-show shifts at the last minute.
The Bizzabo 30–60–90 leader framework frames this timeline as a continuous leadership practice: adapt your plan as new information arrives, evolve it through exercises, and evaluate it after every event. That cycle is what separates one-time safety compliance from a genuine risk management culture.
How do you close the loop after an incident?
The debrief is where risk management pays its longest-term dividends. Most teams skip it or run it informally. The ones who do it well build a compounding advantage across every subsequent event.
Incident report fields to capture
Collect these details for every incident, regardless of severity:
- Who was involved (staff, attendee, vendor, first responder)
- When it occurred (exact time, phase of event)
- What happened (factual description, no editorializing)
- Immediate action taken and by whom
- Outcome (resolved on site, transported, escalated to authorities)
- Photos or video if safely captured
- Witness names and contact information
Debrief agenda
Run the debrief within 48 hours of the event while details are fresh. Include operations, venue management, key vendors, your security contractor, and first responders if they were activated. Structure it in three parts: what went well, what failed or nearly failed, and what changes before the next event.
Prioritize fixes in three tiers:
- Immediate fixes — safety gaps that cannot wait for the next event cycle (update the register, notify the venue, revise the comms template).
- Playbook changes — process updates that go into the master event safety plan.
- Training updates — gaps that require a new briefing module or exercise scenario.
Assign a named owner and a deadline to every corrective action. A debrief without owners produces a list, not a result.
Pro Tip: Track corrective actions in a shared spreadsheet with columns for action, owner, deadline, and status. Review it at the kickoff of every new event. Over three or four events, this becomes your institutional memory.
What templates and tools should you use for event risk tracking?
The best risk register is the one your team will actually use. Start with authoritative templates and adapt them to your workflow rather than building from scratch.
Sample risk register row
Recommended templates and tools
- Events Industry Council Risk Management Guidebook: The standard industry reference. Download it, read the hazard identification section, and adapt the register template to your event type.
- WHO All-Hazards Risk Assessment Tool: Structured scoring methodology for mass gatherings; particularly useful for events with 500 or more attendees.
- Seattle Special Events Safety Plan template: One of the most detailed municipal templates publicly available; use it as a structural model even if your event is in a different city.
Software options
For most brand events, a shared Google Sheet or Airtable base is sufficient for the risk register. Purpose-built event risk platforms offer more structured workflows but add onboarding time. The right choice depends on team size and event complexity. Whatever tool you choose, the non-negotiable is that every department lead has edit access and a clear expectation to update their rows before each milestone check-in.
Understanding your audience profile also informs risk decisions — crowd behavior, dwell patterns, and access needs all shift based on who is attending. Audience profiling resources like those at Babylon Love Growth can help planners use historical data to anticipate crowd dynamics before the risk register is even drafted.
What experienced planners actually prioritize when time is short
Most event risk guides are written for ideal conditions: full lead time, adequate budget, and a cooperative venue. Real production work rarely looks like that. Here’s what actually matters when you’re working compressed timelines and tight margins.
The single highest-leverage action is getting the risk register into a shared document and assigning owners before any other planning task. Not after the venue is confirmed, not after the vendor contracts are signed. First. The register forces every department to name their failure modes, and the act of naming them is what triggers the conversations that prevent them.
Three shortcuts for when time or budget is tight:
- Borrow a municipal template. Seattle’s public safety plan template is free, detailed, and covers 90% of what any large-scale event needs. Adapt it rather than starting from scratch.
- Run a 60-minute tabletop instead of a full drill. A focused scenario session with your command team surfaces more actionable gaps per hour than almost any other exercise type.
- Consolidate your COI collection into one deadline. Set a single date 30 days out and hold every vendor to it. Chasing COIs one at a time in the final week is a time drain that creates gaps.
For brand-focused events specifically, the risk profile extends beyond physical safety. A production failure during a product launch doesn’t just create a safety incident — it creates a brand incident. Sponsor obligations, media coverage, and attendee experience are all on the line. That’s why turnkey production partners who manage vendor COIs, staging certifications, and last-mile logistics as part of their standard scope add real risk-reduction value, not just operational convenience.
King Sixteen reduces your risk exposure from day one
When you’re producing a brand activation, product launch, or conference at the level your clients expect, risk management isn’t a checklist you hand off to a coordinator. It’s embedded in every vendor relationship, every fabrication spec, and every run-of-show decision.

King Sixteen’s turnkey production model means permits, COIs, vendor vetting, AV redundancy, and on-site logistics coordination are handled as part of the engagement — not as add-ons you negotiate after the contract is signed. We’ve produced events for Porsche, Audi, Ray-Ban, and Churchill Downs, and the risk infrastructure behind those productions is the same one we bring to every client. For planners who want a partner that treats safety planning as a core deliverable rather than a liability checkbox, our experiential production services are built for exactly that. Reach out to discuss your next event and get a scoped risk-management consultation as part of the kickoff process.
Authoritative resources for deeper reading
Use these sources to download templates, review regulatory guidance, and validate your plan against accepted U.S. standards.
- Events Industry Council Risk Management Guidebook: The definitive industry reference for event risk frameworks, templates, and accepted practices.
- WHO All-Hazards Risk Assessment Tool: Systematic scoring methodology for mass gatherings; adaptable for any event size.
- Seattle Special Events Safety Plan template: One of the most detailed free municipal templates available; a practical structural model for any large event.
- Bizzabo: Event Risk Management 30–60–90 Plan: Leadership-focused framework with practical checklists and tabletop exercise guidance.
Always verify local jurisdiction requirements with your city or county’s special events office. Permit timelines, insurance minimums, and submission deadlines vary significantly by municipality, and your local safety advisory group is the authoritative source for inter-agency review schedules.
Sources
- Managing health risks during mass gatherings
- Public Safety & Event Management Plan (Seattle Special Events)
- Risk Management Guidebook - Events Industry Council