If your event is built around speech, prioritize intelligibility and pick a point source or portable system sized to the room; if it’s built around music, budget for headroom, subs, and a mixer that can handle dynamics. Either way, run a full channel-by-channel soundcheck with your actual playback sources and walk the room before doors open. Confirm distro, labeled cables, spare batteries, and rigging safety before anyone powers anything on.
TL;DR:
- Point-source systems are ideal for events with fewer than 1,000 attendees, offering faster setup and easier rigging, while line arrays suit large outdoor venues for even sound coverage.
- Proper placement, aiming speakers slightly downward and raising them above head height, is critical to achieve even coverage and avoid muddy sound or feedback issues.
- Conducting a full channel-by-channel soundcheck using actual event files, walking the room, and verifying all cabling and power are essential steps to prevent mid-event failures.
- Sound system setup should follow a strict order: assign roles, rig speakers, run signal flow, power on in sequence, then perform static and gain checks before full test playback.
- Utilizing a professional live-production team ensures consistent oversight, reduces risks of technical errors, and is particularly valuable for high-stakes or multi-zone events.
Table of Contents
- What Goes Into an Event Sound System Setup?
- How Do You Set Up a Sound System Step by Step?
- Point Source or Line Array: Which Speaker Setup Fits Your Event?
- Where Should Speakers Be Placed and Aimed?
- Which Microphones Should You Use, and How Do You Route Them?
- How Do You Set Levels and Prevent Feedback?
- What Do You Check First When Sound Fails Mid-Event?
- What Venue and Power Details Should You Confirm Before Event Day?
- How King Sixteen Reduces Audio Risk on Live Productions
- When Should You Upgrade Gear vs. Hire a Better Operator?
- Ready for Turnkey Audio Production?
- Sources
- FAQ
What Goes Into an Event Sound System Setup?
A working PA is really a chain of specialized parts, and missing even one link causes the kind of failure you can’t fix mid-show. At the core, you have the main PA speakers (the ones covering your audience), subwoofers for low-end weight on music-heavy events, and often outfill or delay speakers to extend coverage across wider or deeper rooms.
Monitors are the part planners forget most. Performers and speakers need to hear themselves, whether through floor wedges or in-ear systems, and that mix runs separately from what the audience hears.
The mixer, analog or digital, is where every input gets balanced, processed, and routed. Stage boxes and DI boxes sit between the performers and the mixer, converting and cleaning up signals before they travel down a snake or Dante line to the console.
Processing lives inside or alongside the mixer: EQ shapes tone, compressors and limiters protect speakers from damage, and feedback suppression tools catch runaway frequencies before they become that screech everyone in the room remembers for the wrong reasons.
None of it works without the boring parts. Before you load in, confirm you have:
- Speaker stands, subwoofer poles, and rated rigging hardware if anything is flown
- Power distribution with enough capacity for the full rig, plus backup breakers
- Labeled cables for every run, so a fix at hour three doesn’t mean tracing wire by hand
- Spare XLR cables, batteries, fuses, and at least one backup mic
- Gaffer tape and cable ramps for any run crossing a walkway
Mackie’s own guide on setting up a portable PA system makes a point worth repeating: the shape of your venue changes how sound behaves as much as the gear itself does. A low-ceilinged banquet hall and an open pavilion demand different thinking, even with identical speakers.
How Do You Set Up a Sound System Step by Step?
Setup order matters more than most planners realize. Do it out of sequence and you risk blown speakers, ground loops, or a soundcheck that eats your whole load-in window. Here’s the sequence that holds up across venue types.
- Assign roles before anyone touches gear. Someone runs FOH, someone handles stage patching, someone manages cable runs. On outdoor shows, confirm your FOH tent or booth position and weather cover first, since repositioning after cables are run wastes real time.
- Place and rig the speakers. Mount mains on stands or rated truss points, angled slightly downward toward the audience, not the back wall. Subs go on the floor, typically near center or split left and right depending on your room. Check every strap, pin, and safety cable before anything goes overhead.
- Run signal flow from source to speaker. The path is mic or instrument to DI, DI to stage box, stage box to console input, console through processing, processing out to the speakers. Label every cable end. When something drops out at hour four, labels are the difference between a ten-second fix and a ten-minute hunt.
- Power up in the right order. Get your distro live and confirmed first. Power the speakers and amps next, then the mixer last. This sequence avoids the pop or thump that can damage a driver when a live signal hits a speaker that wasn’t ready for it. Powering down reverses the order: mixer first, speakers last.
- Run a static check. With nothing plugged into the inputs, listen for hum, buzz, or hiss from your speakers alone. This catches ground loops and bad cables before a single performer steps up.
- Gain stage every channel individually. Bring up one channel at a time, set the input trim so a normal-volume voice or instrument peaks near your console’s target without clipping, then move to the next. Resist the urge to mix with trims. Trims set the input level; faders handle the blend once everything’s staged correctly.
- Run a full playback test for music events. Push a familiar reference track through the system at performance volume. Your ears catch problems a meter won’t, particularly muddy low end or a channel that’s quietly distorting.
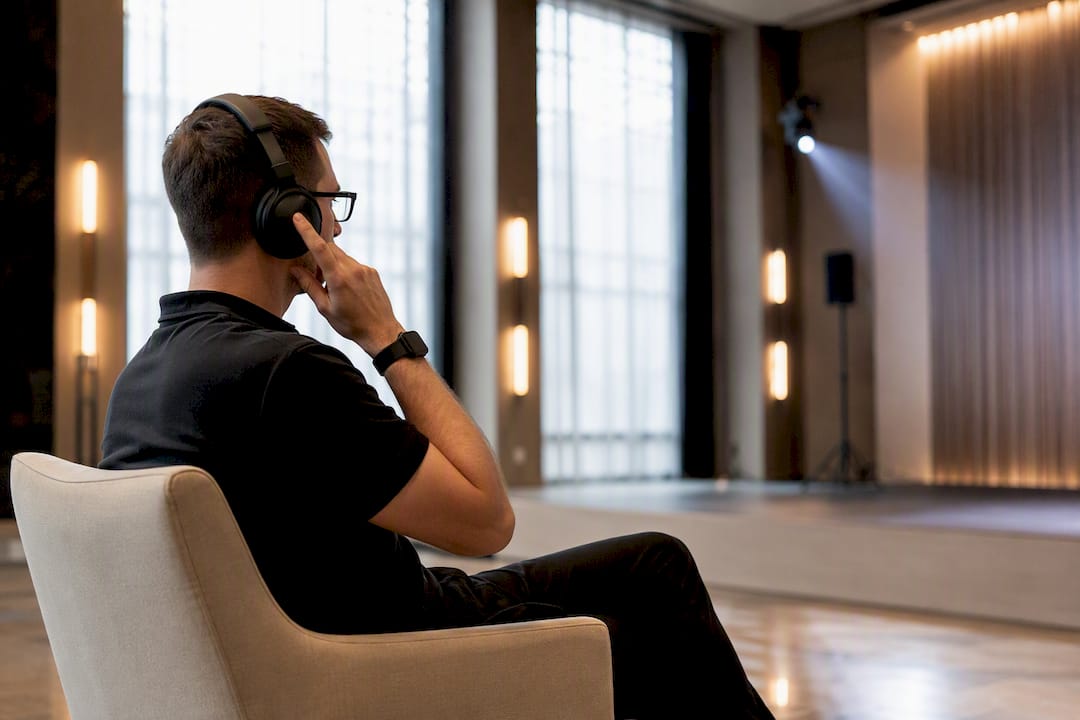
- Walk the room. Physically move through every seating zone and standing area while audio is live. Get a colleague or the client to walk with you and sign off before doors open.
- Lock down mic assignments and store spares. Tape a small label near each channel strip noting which mic or DI feeds it, so a mid-show swap doesn’t require guesswork.
- Set mute groups and print your run-of-show cues. If your event has scene changes, presentation breaks, or scheduled musical acts, pre-build those cues into the console so a scene change is one button, not six manual mutes.
Pro Tip: Do your playback test using the actual files or tracks you’ll use during the event, not a random Spotify song. Some formats and mixes reveal issues, like a boosted bass track clipping a sub, that a generic test song never will.
Point Source or Line Array: Which Speaker Setup Fits Your Event?
The honest answer is that neither setup is universally superior. Line arrays throw sound farther and more evenly across large audiences, but they cost more, take longer to rig, and require real engineering knowledge to tune correctly. Point source systems are faster to deploy, cheaper to rent, and often the smarter choice for anything under a thousand attendees.
Use these rough sizing guidelines as a starting point, then adjust for room shape and content type:
- Up to roughly 300 people: A portable, point-source system or a battery-powered column system, like the JBL EON ONE MK2, handles most indoor events and pop-up outdoor gatherings without any rigging at all.
- 300 to 1,000 people: Larger point-source cabinets or a small flown line array, paired with proper subs if music is involved.
- 1,000-plus people, or any large outdoor footprint: Line arrays with distributed delay speakers become worth the added cost and crew, since they maintain intelligibility across depth that point source systems start to lose.
Subwoofers matter differently depending on your content. A speech-heavy conference rarely needs much low end, and overdoing subs on spoken word just adds boom that muddies consonants. A dance floor or festival stage, on the other hand, lives and dies by low-frequency punch. Festival production checklists, including the sizing framework from Primal Sounds, tie sub counts and staffing directly to expected crowd size, which is a smarter planning method than guessing.
Outfill speakers widen your coverage for rooms broader than they are deep, while delay speakers push sound further back without simply cranking the mains louder, which would blast the front rows to compensate. Delay speakers, timed correctly, close that gap.
Where Should Speakers Be Placed and Aimed?
Placement decides whether your system sounds professional or muddy, often more than the gear itself. A mediocre speaker aimed well beats an excellent one aimed poorly.
Raise your main speakers above head height whenever possible, then angle them down slightly so coverage lands evenly across seated and standing zones instead of blasting the first row while starving the back. Front-fill speakers, small units placed low and wide near the stage lip, handle the audience closest to the stage that your elevated mains tend to overshoot.
- Space delay speakers using arrival-time thinking, not just distance. As a working starting point, plan for a delay zone roughly every 60 to 80 feet in a deep room, adjusting based on how the room actually sounds during your walk-the-room check.
- Keep monitor wedges angled away from vocal mics whenever you can, since a mic pointed straight at its own monitor is the single most common feedback trigger on any stage.
- Outdoors, wind alters how sound travels and can physically push your mix off-axis from where you aimed it. Protect mixers and powered speakers from moisture and direct sun, both of which damage electronics over a multi-hour event.
- Avoid placing subs flush against hard, reflective surfaces like concrete walls or metal staging outdoors, since reflected low frequencies cancel or reinforce unpredictably and muddy the mix.
Practical field guidance backs this up directly: placement, not gear spec, tends to be the biggest single factor in how good a system sounds to a real audience, according to production best-practice guides built around live-event site surveys.
Pro Tip: Do your walk-the-room test standing where your VIP or client will actually be seated, not just at the mix position. That’s the seat that gets remembered.
Which Microphones Should You Use, and How Do You Route Them?
Mic choice comes down to what’s happening on stage, not personal preference. A handheld dynamic mic suits open Q&A and moderated panels because it’s forgiving of handling noise and easy to pass between speakers. Lavalier or headset mics work better for presenters who need both hands free, particularly on stages with a lot of movement. Instruments almost always need a DI box rather than a mic input, and bands need dedicated kick, snare, and overhead mics tuned to that specific kit.
- Handheld dynamic mics: panels, audience Q&A, award presentations
- Lavalier or headset mics: keynote speakers, presenters walking the stage
- DI boxes: keyboards, bass, acoustic guitar pickups, and any line-level instrument source
- Dedicated drum and instrument mics: live bands and full musical acts
Wireless coordination is where inexperienced setups fall apart fastest. Plan your frequencies in advance rather than trusting auto-scan on the day, since a nearby venue, food truck, or even a competing event can be sitting on the same band. Scan for interference once you’re on site, and always carry a spare receiver and fresh batteries for every wireless channel in use.
Routing stays simple if you keep discipline about it. DI boxes feed instrument signals cleanly into the same stage box that carries your mic lines, whether that’s a traditional snake or a Dante network run. Label every input at both ends. For microphone types and placement specific to different presenter styles, matching the mic to the person matters as much as matching it to the room.
Monitor mixes deserve their own plan, not an afterthought. Decide early whether performers get wedges or in-ears, and for anything beyond a single speaker on a small stage, put one person on monitors and a different person on the house mix. Running both from one console during a live show is where mistakes creep in.
How Do You Set Levels and Prevent Feedback?
Gain staging is the unglamorous work that determines whether your whole show sounds clean or fights you all night. Get it right at the start and everything downstream gets easier.
- Set input trims first, one channel at a time. Bring the source up to its normal performance volume and adjust the trim so peaks land near your console’s target level without clipping.
- Mix with faders, not trims. Once every channel is staged correctly, use the faders to build your blend. Going back to trims mid-show to fix a balance issue almost always causes new problems.
- Apply a high-pass filter on speech mics. Cutting everything below roughly 80 to 100 Hz removes handling rumble and stage noise without touching vocal clarity.
- Use subtractive EQ, not boosts, to fix problem tones. If a mic sounds boxy or harsh, find the offending frequency and pull it down rather than boosting everything else around it.
- Set compressors and limiters based on content type. Live music needs a limiter riding just below your system’s clipping point to protect speakers during loud hits. Speech-only events need far less compression, since over-processing a voice makes it sound unnatural fast.
- Handle feedback with a narrow cut, not panic. The moment you hear a ring building, find the frequency, apply a tight subtractive EQ cut right at that point, and only lean on automatic feedback suppression as a last resort, since overusing it dulls the whole mix.
Live-sound buying guides, including B&H’s Live Sound 101 primer, point to the same core truth: most feedback and clarity problems trace back to gain staging done poorly at the start, not bad luck mid-show.
What Do You Check First When Sound Fails Mid-Event?
Every audio failure has a short list of usual suspects. Work through them in order instead of guessing.
- No sound at all: Check the power connection first, then the master mute on the console, then confirm the source device (laptop, phone, mic) is actually sending signal.
- Hum or buzz: Try a ground lift on the offending channel, check whether you’ve mixed balanced and unbalanced cables on the same run, and confirm nothing shares a circuit with a dimmer pack or motor.
- Wireless mic dropouts: Swap antenna orientation first, change to a cleaner frequency second, and always have a wired backup mic ready to hand off instantly.
- Distortion or clipping: Pull back the preamp gain on that channel, check whether the source device itself is overdriven, and glance at your amp or speaker limiter lights.
- Feedback ringing: Lower the offending channel immediately, reposition the mic or monitor causing it, then apply a narrow EQ cut at that frequency once things are stable.
Keep this list printed and taped near your console. When something goes wrong in front of three hundred people, you don’t want to be scrolling a phone for answers.
What Venue and Power Details Should You Confirm Before Event Day?
Most audio disasters trace back to something that should’ve been checked weeks earlier, not gear that failed on site. Confirm your available circuits and calculate your full system’s power draw against them well before load-in, and arrange a backup generator if the venue’s power feels marginal.
- Verify rigging points and their weight ratings if you’re flying any speakers, and book a certified rigger rather than improvising with truss you’re not sure about.
- Confirm your load-in window and access path, including door widths, elevator access, and whether your stage footprint blocks any sightlines once it’s built.
- Check local noise ordinances and curfew rules, particularly for outdoor events, and confirm what insurance the venue requires before you sign anything.
- Plan cable protection across any walkway the public will cross, using ramps or matting rather than loose tape.
- Get weatherproof covers for consoles and powered speakers on any outdoor booking, even if the forecast looks clear.
A quick site visit resolves most of this in an afternoon and prevents the kind of day-of scramble that no amount of gear budget can fix.
How King Sixteen Reduces Audio Risk on Live Productions
Centralizing production, meaning one team managing AV, staffing, and run-of-show together instead of three separate vendors, closes the gaps where most audio failures happen. A managed production team builds events around labeled signal flow, dedicated RF coordination for wireless mics, a designated A1 engineer, backup gear on hand, and a pre-event site survey to catch power or rigging surprises early. That last piece matters more than most planners expect: a structured staffing process with clear roles assigned before load-in prevents the majority of the scrambling that happens when nobody owns a specific problem.
When Should You Upgrade Gear vs. Hire a Better Operator?
Spend on operator experience before you spend on speaker upgrades. A skilled engineer gets more out of a modest rig than a novice gets out of a premium one. Reserve a turnkey partner for high-stakes launches or multi-zone events where one missed cue is visible to everyone. When hiring any AV partner, hand them your run-of-show, mic count, stage plot, and venue power details before they ever quote the job.
Ready for Turnkey Audio Production?
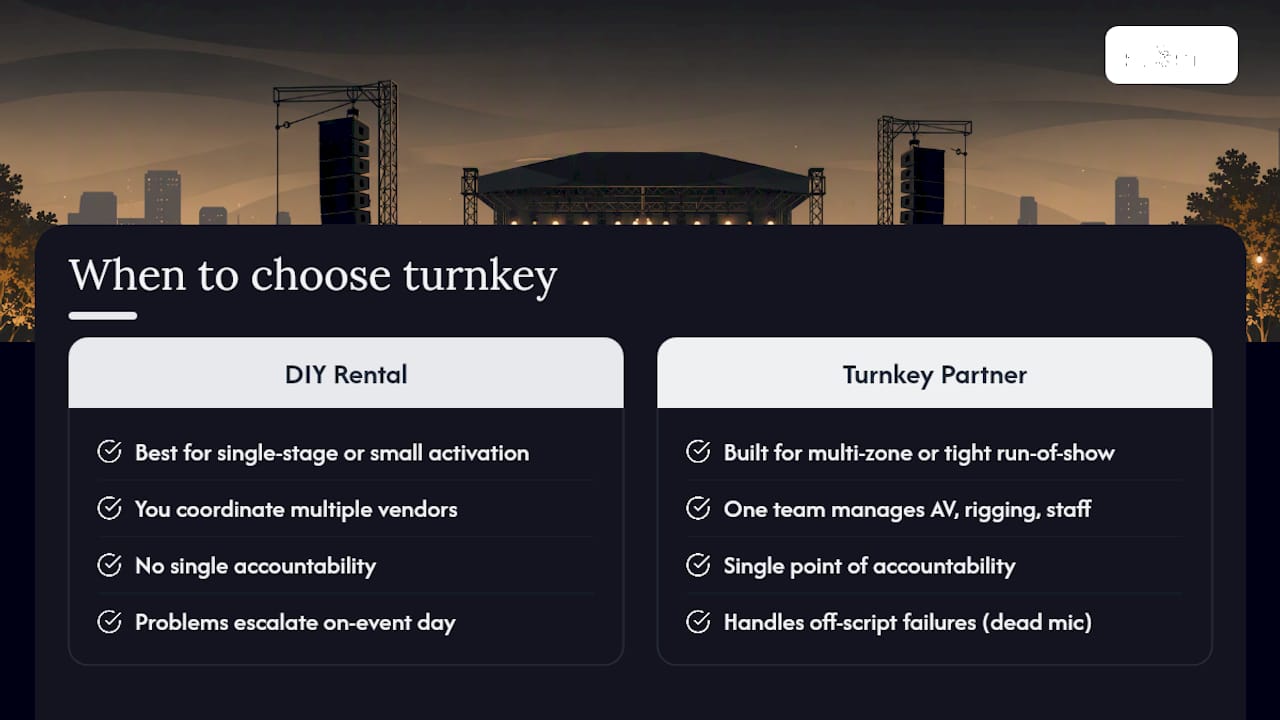
Running your own soundcheck and walk-the-room test works fine for a single-stage meeting or a small activation. Once you’re managing multiple zones, a tight run-of-show, or a launch where one dead mic becomes the story instead of the brand, that’s where a managed production partner earns its keep. A turnkey model puts one team in charge of AV, rigging, staffing, and run-of-show execution, so you’re never coordinating three vendors who’ve never spoken to each other before your event day.

That single-point-of-accountability approach is exactly what King Sixteen built its private events and full production services around. Whether you’re staging a product launch with multiple stage zones or a corporate retreat with a single keynote, the difference between renting gear yourself and bringing in a production partner usually shows up the moment something goes off-script, and something always does.
If your event’s stakes are high enough that a dead mic or a blown speaker would actually hurt the brand, that’s your signal to bring in help rather than gamble on a DIY rig. Visit King Sixteen to start a project inquiry and get a production plan built around your specific stage, guest count, and venue constraints.
Sources
Planners who want to go deeper on specific gear or sizing decisions can start with these:
- The Mackie Guide to Setting Up a Portable PA System for Live Events
- Festival Production Checklist (2026) | Primal Sounds
FAQ
Which sound system is best for events?
There’s no single best system since it depends entirely on crowd size and content. Portable point-source systems, like the JBL EON208P or Fender Passport Venue Series 2, handle most events under a thousand guests, while line arrays with delay speakers suit large outdoor crowds where uniform coverage matters more than portability.
What is the 83% rule for speakers?
It’s a rough guideline tied to how human hearing perceives delayed sound arrival across a deep venue. Once the time gap between your front-of-house sound and sound reaching the back of the room grows large enough, listeners may start hearing two distinct sources instead of one, which is the cue to add properly timed delay speakers.
How should I set up my sound system for an outdoor event?
Protect your mixer and powered speakers from wind, moisture, and direct sun, and avoid placing subwoofers flush against hard reflective surfaces that can muddy low frequencies. Run your full soundcheck and walk-the-room test outdoors under real conditions, since wind alone can shift how your mix lands on the audience.
What is the best sound system for large events?
For crowds over roughly a thousand people, or any large outdoor footprint, line arrays paired with distributed delay speakers typically outperform point-source setups because they maintain intelligibility across greater depth. Festival sizing frameworks like the one from Primal Sounds tie system scale and staffing directly to expected attendance rather than guesswork.
Does King Sixteen provide audio equipment for events?
King Sixteen manages AV, staffing, rigging, and run-of-show as part of its turnkey production services rather than renting standalone gear. Current service details and pricing are available directly on the King Sixteen site for planners requesting a project consultation.
Recommended
- Event Production Tips for Planners and Marketers
- Event Production Workflow: A Step-by-Step Guide for 2026
- Step-by-step event staffing: your guide to flawless brand experiences
- Advantages of Turnkey Event Services for Planners